Other Document Management Features
Find Similar Documents
Find Similar provides an easy way to perform searches based on the results of a previous search query. For example, a search is performed for any item created in the last two weeks.. What if a user wants to search for all invoices for a particular page number that are displayed in the search results? If a user right-clicks on the “Page Count” attribute cell in the grid and selects “Find Similar”, a new dialog box will pop up.
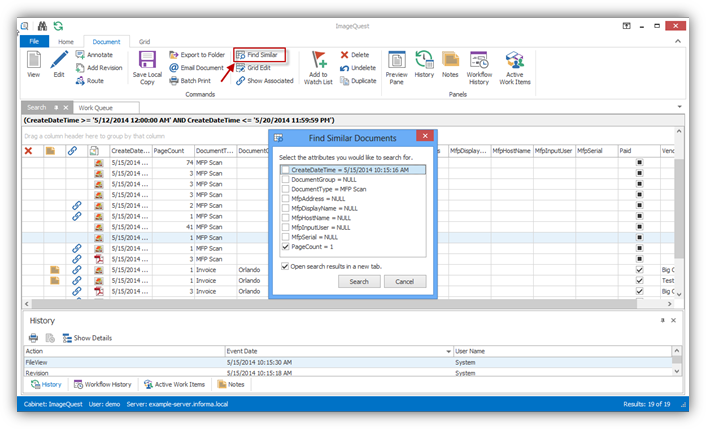
Notice that “Page Count” has been automatically checked. If the user had right-clicked on the “Invoice Number” cell, that field would have been checked by default instead. Clicking the search button at this point would do a new search where “PageCount” is equal to “1”. Additional attributes can also be selected as well to “AND” the results together.
New Search Tab
The New Search Tab is beneficial to the user if they are managing two or more searches concurrently. A user may open a New Search Tab by clicking the “New Search Tab” in the “Home” ribbon tab as highlighted below.

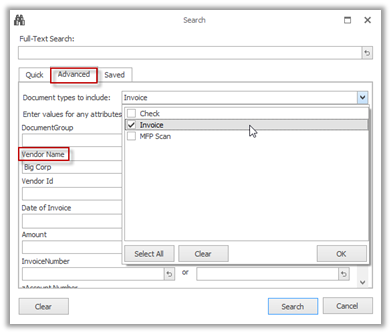
Once the New Search Tab is selected, a “Search” window appears to initiate a new search via “Quick” search, “Advanced” search or “Saved” search as illustrated below; in this figure, for example, the new search is initiated via the “Advanced” search for an Invoice with the vendor name “Big Corp.”. Click “Search” to perform the search.
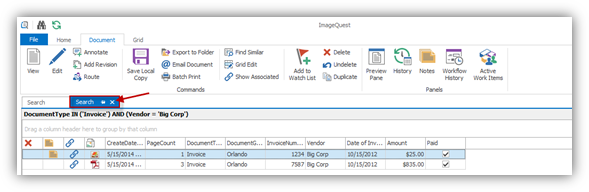
The new search results are displayed in a new
search tab as illustrated here. The user may switch between
the tabs to view the different search results. Currently, an
unlimited number of search tabs may be open. To close a
search tab, click the ![]() button as highlighted
below.
button as highlighted
below.
Save Local Copy
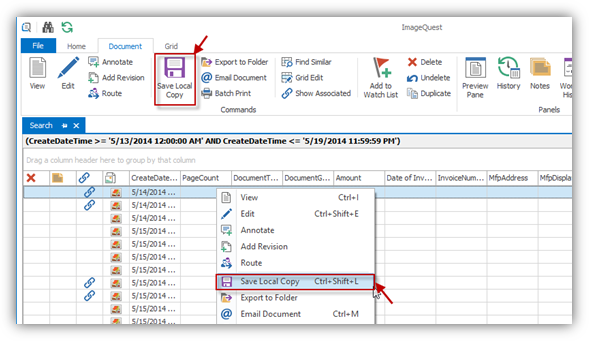
“Save Local Copy” allows IQ users to save documents from IQdesktop to their client PC or a network location. To save a local copy, right-click on a document and select “Save Local Copy” or click on the “Save Local Copy” button from the “Document” ribbon tab. A Windows “Save As” dialog will open and the user can then save the document to the desired location. To save multiple documents at once, select multiple documents in the grid by pressing <ctrl> or <shift> while selecting. Then follow the same procedure to save them all to the same location. Saved copies names will include their document type and any attributes with the “Include in Filename” setting.
Email Document
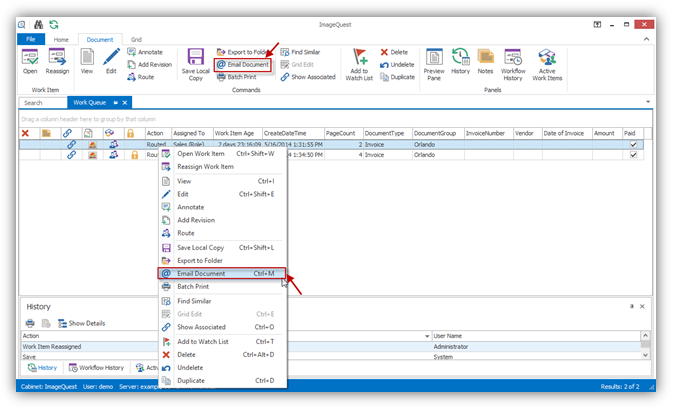
“Email Document” allows users to email IQ documents as attachments using their default mail client.
To email IQ documents, right-click on the selected document(s) and select “Email Document”. See below.
The default email client will open a new window with the selected document(s) attached. The screenshot below shows an Outlook Express message with “Invoice (Revision 1).pdf” as the attachment. The user can now complete and send the message with the IQ document attached.
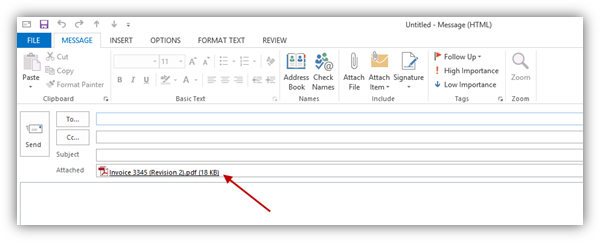
Note: Email Document requires a compatible MAPI client (i.e. Outlook, Outlook Express) to function.
Batch Print
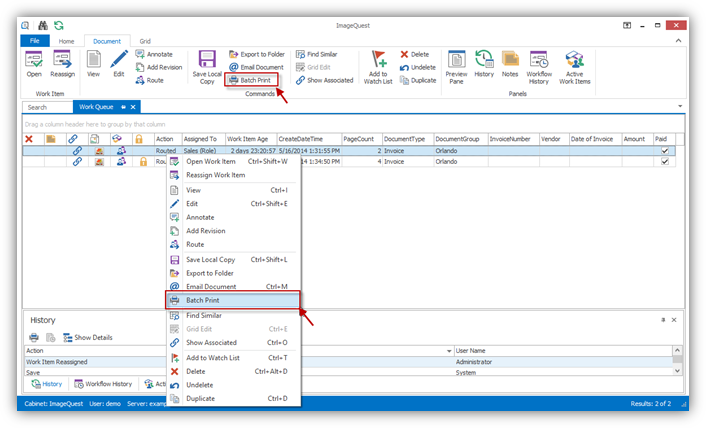
Users are now able to select multiple documents from the search grid in IQdesktop and print them all at the same time.
To print multiple documents, hold down the
CTRL key and then left click each document to be printed one
time. Alternatively, to print a range of documents, left
click on the first document one time and then hold down the SHIFT
key and left click on the last document one time. Once all of
the documents are highlighted, select the ![]() ”Batch Print” button from the
“Document” ribbon tab or right click on one of the
highlighted documents and select ‘Batch Print’. The selected
documents will then be sent to the user’s default printer for
printing.
”Batch Print” button from the
“Document” ribbon tab or right click on one of the
highlighted documents and select ‘Batch Print’. The selected
documents will then be sent to the user’s default printer for
printing.
Note: Batch Print only works with TIF and PDF documents. If other file types are included in the print selection, only the supported files will be queued for printing.
Watch List
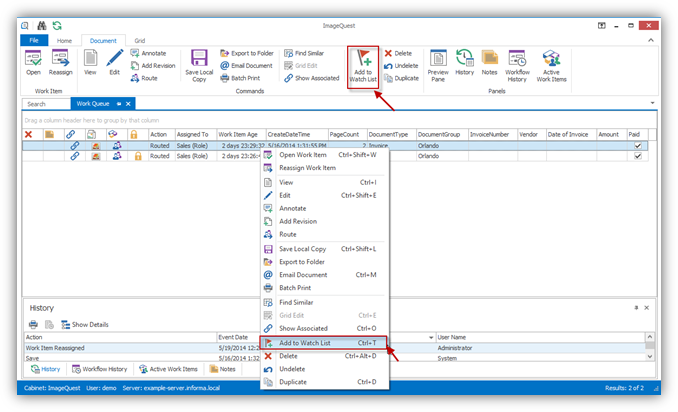
The purpose of the Watch List is to bookmark a document for future reference instead of having to search for it again. To watch a document, highlight the document and select “Add to Watch List” by right-clicking and selecting it from the drop down menu or click on “Add to Watch List” button from the “Document” ribbon tab.
The “Watch List” may be accessed from the “Home” ribbon tab by clicking on the “Watch List” button. The Watch List opens in its own tab as shown below and is specific to each user.
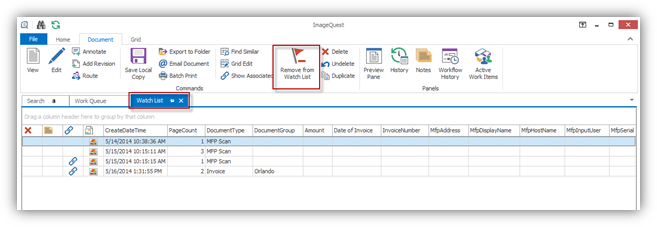
To stop watching a document, click on “Remove from Watch List” from the “Document” ribbon tab or from the right-click menu.
Export to Folder
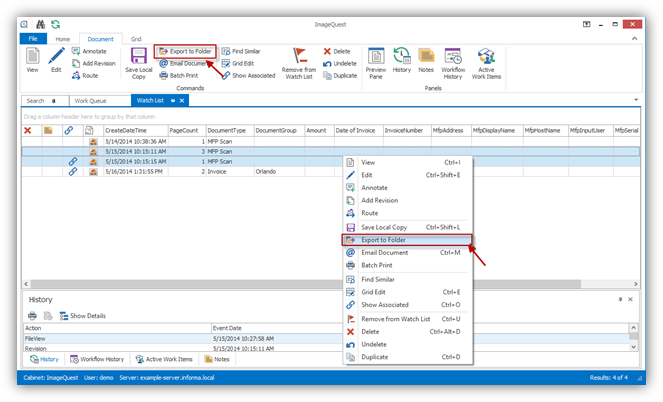
The Export to Folder feature allows documents selected in IQdesktop to be exported to a folder on the user’s PC; an HTML page with searchable metadata is also created. The user can then manually copy them to removable media if necessary. This creates portability for the set of documents selected for reference outside of IQdesktop.
Only the documents selected in the current grid will be flagged for export. Hold down the CTRL key while clicking individual documents to select individual documents or press CTRL+A to highlight all of the documents in the grid. Once all the documents have been selected, click “Export to Folder” from the Document ribbon tab to export the selected documents to a folder or right click and selected “Export to Folder” from the drop down box as demonstrated on the next page.
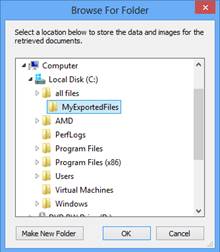
The “Browse for Folder” window appears allowing the user to either select an existing location, or to create a new folder. In the screenshot below, selected documents will be exported to “C:\AllFiles\MyExportedFiles” folder. Click “OK”.
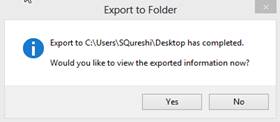
The selected documents have now been exported to the “C:\AllFiles\MyExportedFiles” folder as noted below. Click “Yes” to view the exported information.
The window below displays the exported documents in a searchable html file (default.hta). Double-click a row to view a document in its native viewer.
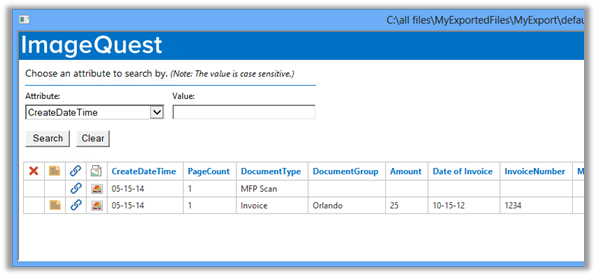
Note: Searches performed from the default.hta file are case sensitive.
Duplicate
To create a duplicate copy of a record, highlight the record and select Duplicate from the right-click menu or from the “Document” ribbon tab as illustrated below.
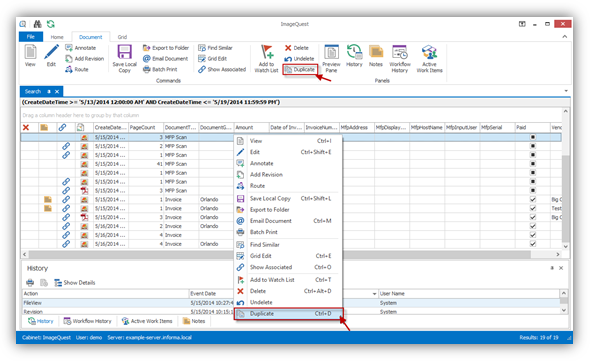
The Duplicate Document window will open as shown on the next page. The duplicate record Document Type and attributes may be edited before clicking “Save”.
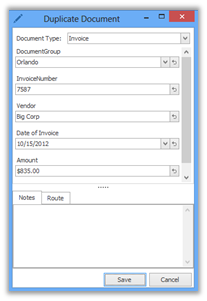
Note: Users must have the “Add Document” permission to create duplicate records.
Show Associated
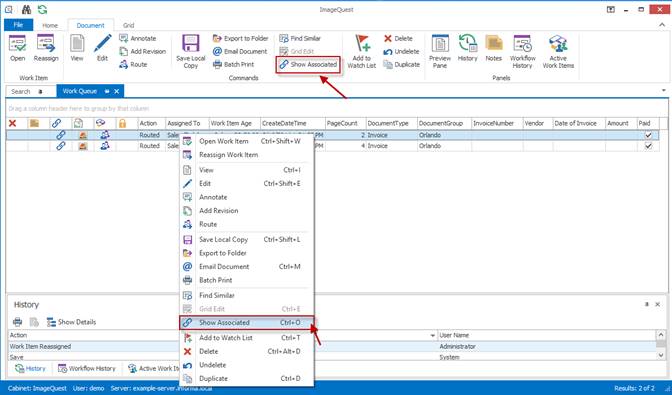
When documents are scanned into the Indexing Queue, they arrive with a document type of “MFP Scan”. After a document batch has been indexed, it may be useful to see the original scanned batch. To show the original MFP Scan document batch, select Show Associated from the “Document” ribbon tab as displayed.
All associated documents, if any, will appear
in their own tab. Associated documents display the
![]() icon next to them as shown
below.
icon next to them as shown
below.
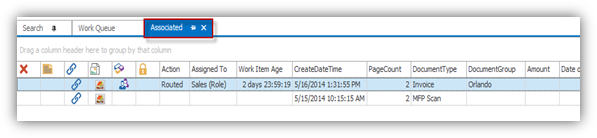
Note: Users must have Allow access to the “MFP Scan” document type in order for them to appear as associated documents.
Note: Duplicate records are also linked together by using “Show Associated”.
Import a File
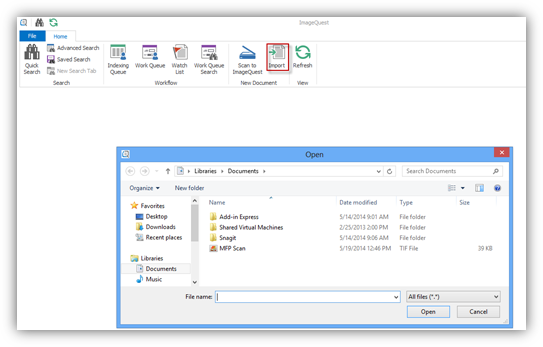
Import allows users to browse for and select a file from a client PC or network location and import the file as a document to IQdesktop.
To import a file, click
the ![]() button from the “Home” ribbon
tab to launch a Windows “Open” dialog as seen below. Locate and
select the file to import and click Open to launch the “Import to
ImageQuest” indexer and assign a Document Type and attribute
values.
button from the “Home” ribbon
tab to launch a Windows “Open” dialog as seen below. Locate and
select the file to import and click Open to launch the “Import to
ImageQuest” indexer and assign a Document Type and attribute
values.
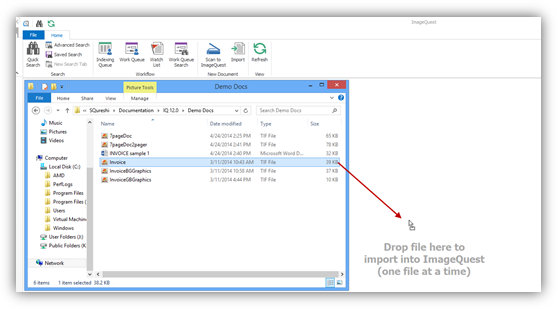
Users can also “drag and drop” files onto the application to them to IQdesktop, as seen here.
Once a file has been selected, the user can index the document as shown below. A User or Role may be selected for routing purposes and a message can optionally be filled out. Click “OK” to import the document to IQdesktop.
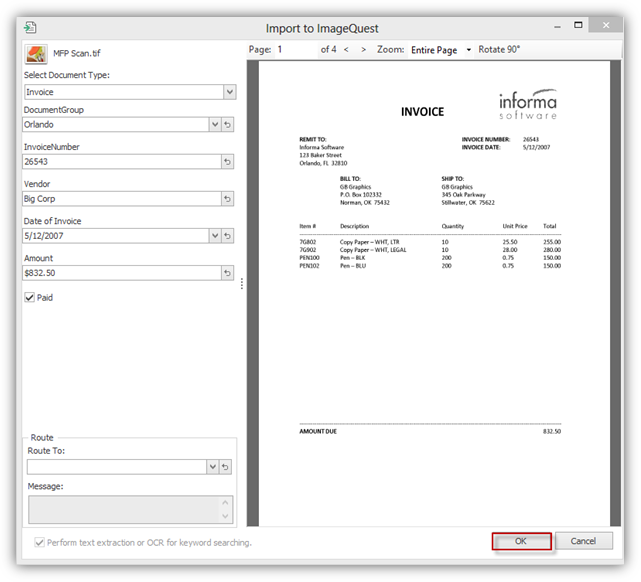
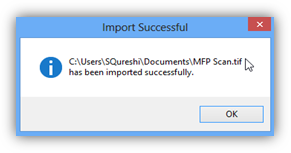
An “Import Successful” message will confirm the import is complete, as shown below. Click on “OK” to continue.
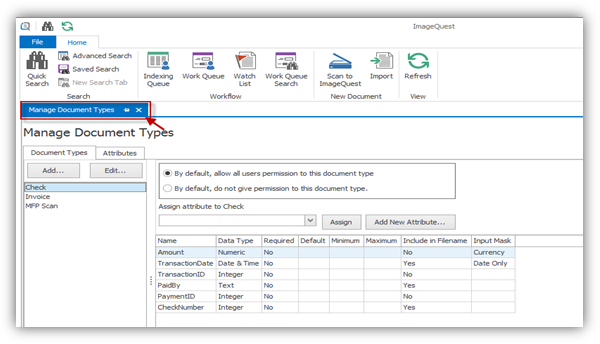
Managing Document Types
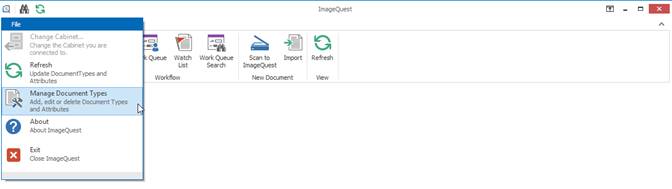
Document Types and Attributes may be added and edited from IQdesktop if the user has Allow permissions to “Manage Document Types.” This feature allows administrators to give certain users access while still restricting them from other administrative functions that require the use of IQadministrator. To Manage Document Types from IQdesktop, select the feature from the “File” Tab as shown below.
The screenshot below highlights the Manage Document Types tab which is the same screen that appears in IQadministrator. For more information on Manage Document Types, see the ImageQuest Administrator’s Guide.