Work Queue
The Work Queue displays a list of documents that were either manually routed from another IQ user or were automatically created by a notification rule that was setup by the IQ administrator. Documents that were routed to a role will be visible to all members of that role. The Work Queue can be used to process documents that require some type of intervention.
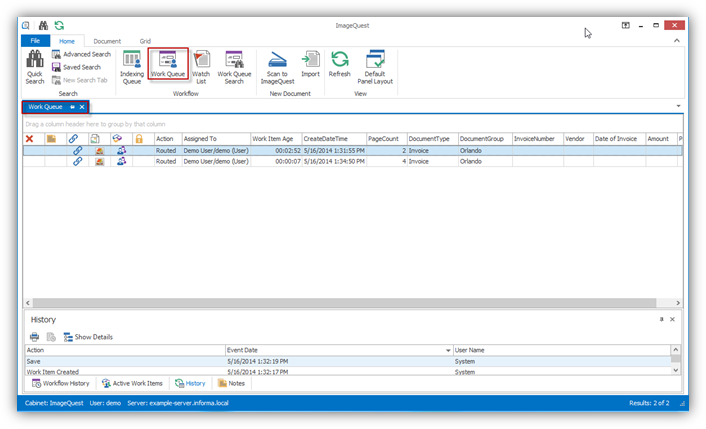
Unlike the search tab, double clicking a record in the work queue will open the work item for processing rather than viewing the document. In order to launch the document from the work queue in the native file viewer, the user will have to click the “View” button on the ribbon or right click on the document and select “View.” Users may also right click on a document and select ‘Open Work Item’ to process a work item in the work queue.
There is a special column in the Work Queue called “Action” that shows how the document arrived. It will either show the name of the notification rule that was responsible for routing the document, or it will display a message that indicates it was manually routed to a specific user or role.
A single document can be displayed in the Work Queue multiple times for different reasons and each instance needs to be processed separately. Also, users must have the Update Document permission in order to complete work item requests.
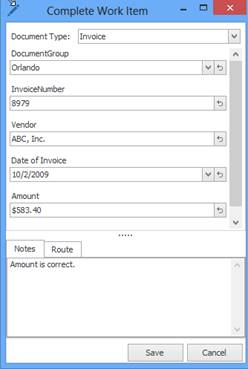
When a user double-clicks a work item, the “Complete Work Item” window appears as shown below. This window looks exactly like the edit document screen. The main difference is that saving these changes will cause the document to be removed from the work queue, even if nothing has been modified.
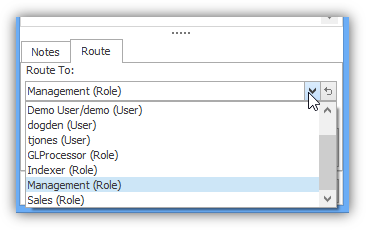
For this example, the user enters a note to confirm the Amount is correct and selects the Management role from the Route tab. When the user clicks “Save”, the work item is removed from the user’s Work Queue and will added to the Management role’s Work Queue.
Note: If you complete the work item and do not change any of the attributes, it could possibly reappear again if it still meets the criteria of a notification rule.
Note: The delete function in the Work Queue functions the same as it does from the search grid. If you delete a document from the Work Queue, it will be flagged as a deleted document and will no longer show up in search results. The Complete Work Item option is the only way to remove the document from the Work Queue properly.
Work Queue Columns
Four new columns have been added to the work queue to assist with processing work items: Work Item Age, Work Item Type, Locked and Assigned To. The Action column has also been changed from previous versions.
|
Work Item Age |
Shows how long the document has been in the current work queue |
|
Work Item Type |
Denotes where the work item came
from. There are currently three different types of work
items: Routed |
|
Locked |
The locked column is designated with the
|
|
Assigned To |
Denotes whether a work item is owned by an individual user or is shared with other users in the same roles (previously displayed in the Action column). |
|
Action |
Displays the Notification Rule name or the Workflow Name that was configured in IQadministrator. For routed work item types, this will always be listed as Routed. |
Quick Approve
Quick Approve allows users to quickly approve one or more work items without having to first open each work item in the Work Queue. Users must have the Update Document permission in order to use the Quick Approve Work Item feature.
Quick Approve can be used in the following scenarios:
· Basic AP Workflow if the user is a member of the Final approval role
· Work items added via Route or Notification Rules
· A standard Request Approval Activity
· Certain Workflow Custom Activities
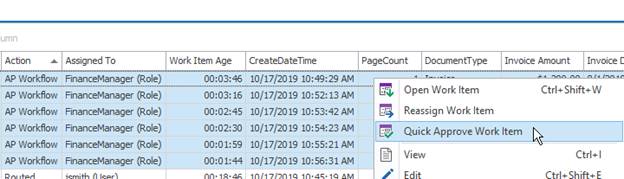
Quick Approve is available in the Document ribbon or by right-clicking on a document or group of documents in the Work Queue and selecting “Quick Approve Work Item”.
![]()
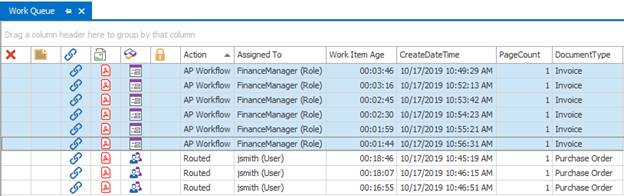
In the example below, the user’s Work Queue has six AP Workflow items and three Routed items. The user selects all of the AP Workflow items they wish to apporve.
The user can now click Quick Approve or right-click on the group of work items and select Quick Approve Workflow Item
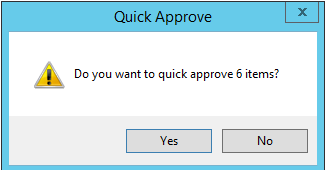
A Quick Approve dialog will be displayed asking the user to confirm they wish to perform Quick Approve on the work items and includes the number of work items that will be approved.
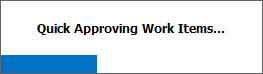
If the user clicks “Yes”, a status bar will show the progress of the quick approve process.
If the user clicks “No”, none of the work items will be approved and they will remain in the user’s Work Queue.
Once the process is completed, the work items will be removed from the user’s Work Queue.
A History entry will be added for each work item that was Quick Approved and it will include the Event Date and User Name. See example below.

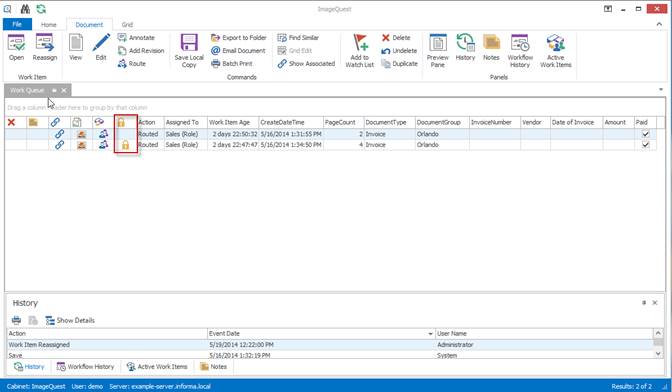
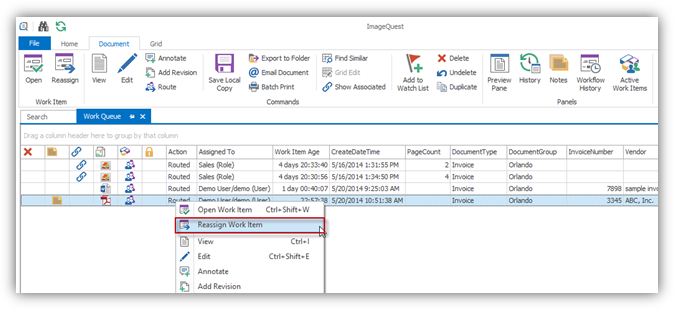
Reassign Work Items
Work Queue items may now be reassigned to other users or roles by right clicking on one or more documents and selecting ‘Reassign Work Item’. When a work item is reassigned to another user or role, it is removed from the current work queue and an email notification is sent to the newly assigned user(s).
Record Locking
When a document is opened from the work
queue or from the WebIQ email link, the document record will be
locked so that other users cannot process the document at the same
time. This is the same mechanism that exists in the Indexing Queue.
Documents will stay locked for thirty minutes and can be overridden
after the lock period expires. Locked documents are denoted by the
![]() icon.
icon.