Install OXPd on the device
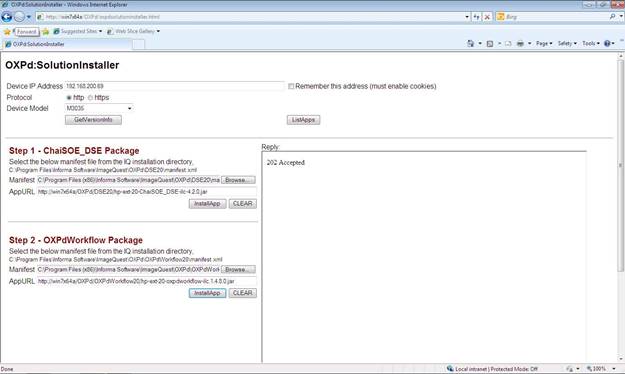
Open the following in a browser: http://<imagequestservername>/OXPd/oxpdsolutioninstaller.html to load the OXPd SolutionInstaller page. Do not use “localhost” for the ImageQuest Server name.
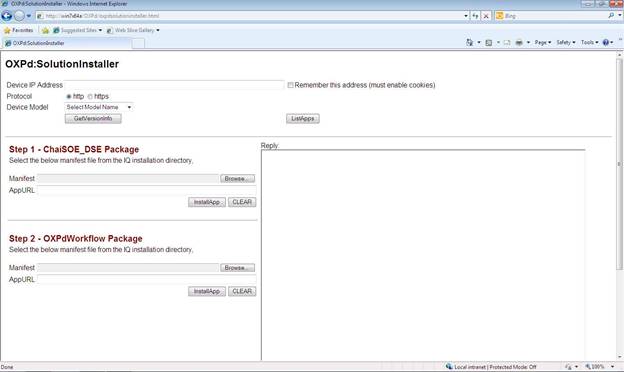
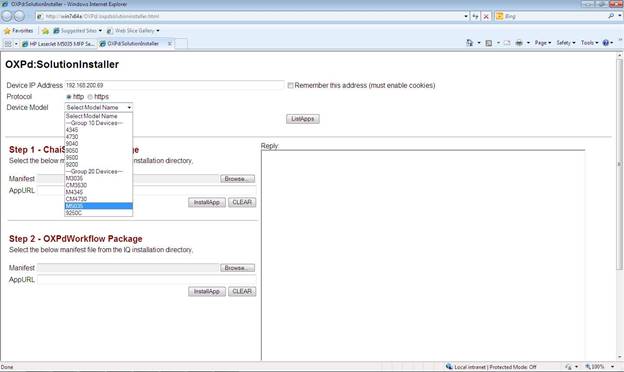
Enter the device IP address in the “Device IP Address” field,
select either http or https for “Protocol” and select the HP device
model number from the “Device Model” drop-down.
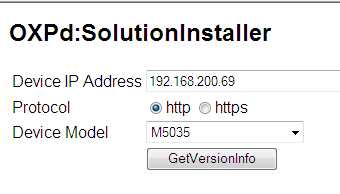
In the example below, “192.168.200.69” is used for Device IP Address, Protocol is “http” and the “M5035” is selected from the Device Model drop-down.
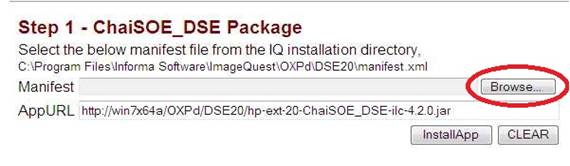
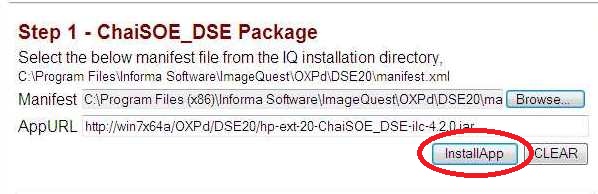
For Step 1, click
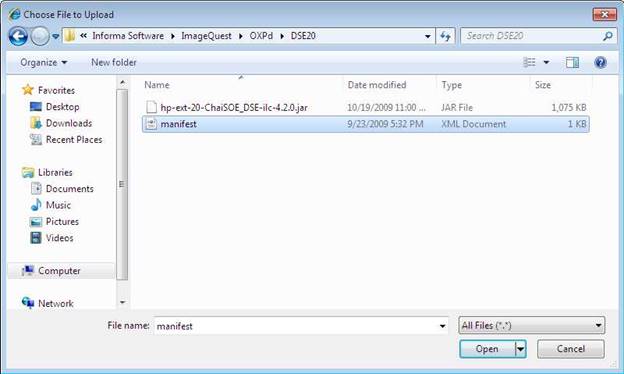
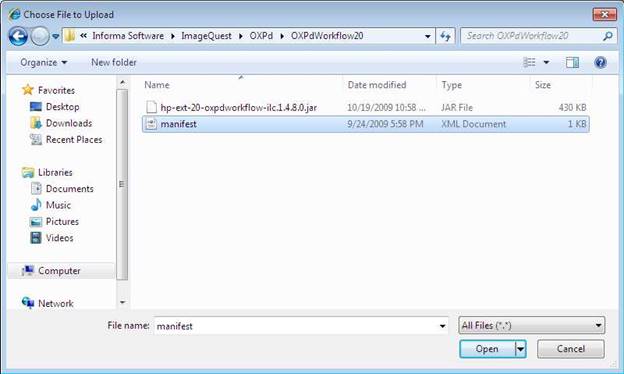
“Browse” to locate the ChaiSOE_DSE Package manifest. This
manifest is located in the Informa Software application directory
on the ImageQuest Server.
There are three different ChaiSOE_DSE Package manifests available, DSE10, DSE20, or DSE30. When a Device Model is selected, the OXPd SolutionInstaller page will display the folder path above the “Manifest” field and includes the proper DSE folder for the selected device model. In the example below, the sample path is “C:\Program Files\Informa Software\ImageQuest\OXPd\DSE20\manifest.xml”.
Browse to the proper file folder on the ImageQuest Server and click “Open” to select the manifest.
Click “InstallApp” to install the ChaiSOE_DSE package
manifest. You may need to provide the HP device admin
credentials to proceed.
The Reply box will display “202 Accepted” if the file upload was successful.

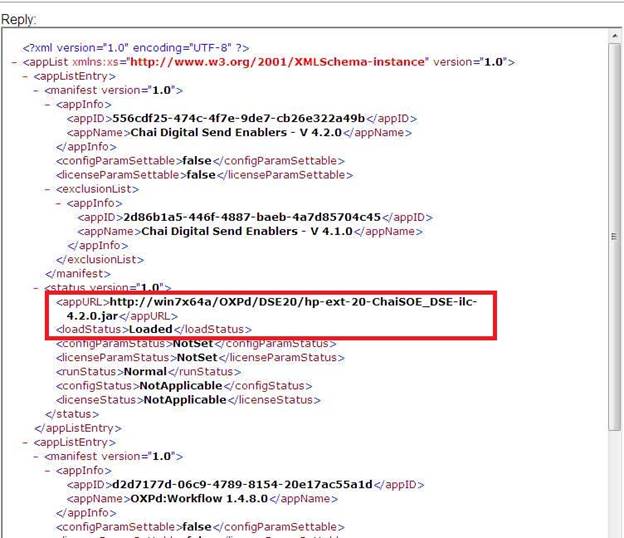
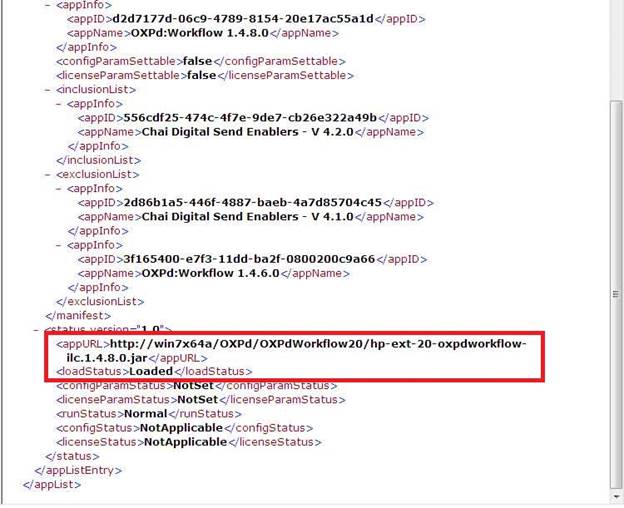
Verify the ChaiSOE_DSE Package manifest loaded successfully by
clicking the “ListApps” button above the Reply field and confirm
the “loadStatus” for the ChaiSOE DSE “appURL” is “Loaded”.
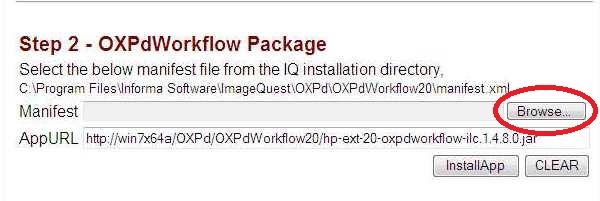
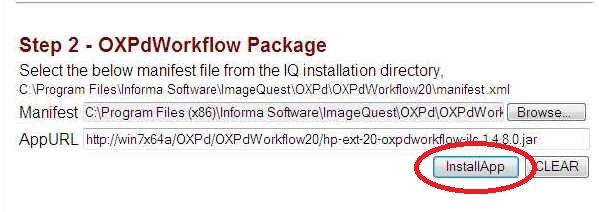
For Step 2, click “Browse” to locate the OXPdWorkflow Package manifest. This manifest is located in the Informa Software application directory on the ImageQuest Server.
There are three different OXPdWorkflow Package manifests available, OXPdWorkflow10, OXPdWorkflow20 or OXPdWorkflow40. When a Device Model is selected, the OXPd SolutionInstaller page will display the folder path above the “Manifest” field and includes the proper OXPdWorkflow folder for the selected device model. In the example below, the sample path is “C:\Program Files\Informa Software\ImageQuest\OXPd\ OXPdWorkflow20\manifest.xml”.
Browse to the proper file folder on the ImageQuest Server and click “Open” to select the manifest.
Clck “InstallApp” to install the OXPdWorkflow Package manifest.
The Reply box will display “202 Accepted” if the file upload was successful.
Verify the OXPdWorkflow Package manifest loaded successfully by
clicking the “ListApps” button above the Reply field and confirm
the “loadStatus” for the OXPdWorkflow20 “appURL” is “Loaded”.
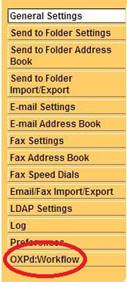
To confirm OXPd was successfully loaded onto the device, log into the device Embedded Web Server (EWS) click the “Digital Sending” tab and verify “OXPd:Workflow” is listed in the settings menu. Select “OXPd:Workflow” to view the current settings.
![]()
The device is now ready to be added to ImageQuest using Configure IQmfp (OXPd) in IQadministrator. Please make sure your device is licensed prior to adding it to ImageQuest.

Click “New” to add a new device. The IQ Server field will be populated with the ImageQuest server information.
Enter the Display Name and Host Name/IP Address for the new device. In the example below, “M5035” is used for Display Name and IP address “192.168.100.26” is used for Hostname/Address. Press the Tab key to connect to the Mfp device.

If the connection is successful, the MFP device Model Name and Serial Number will be populated as shown below.
The administrator can then select the default settings for Page Orientation, Color, Page Size and Number of Sides.
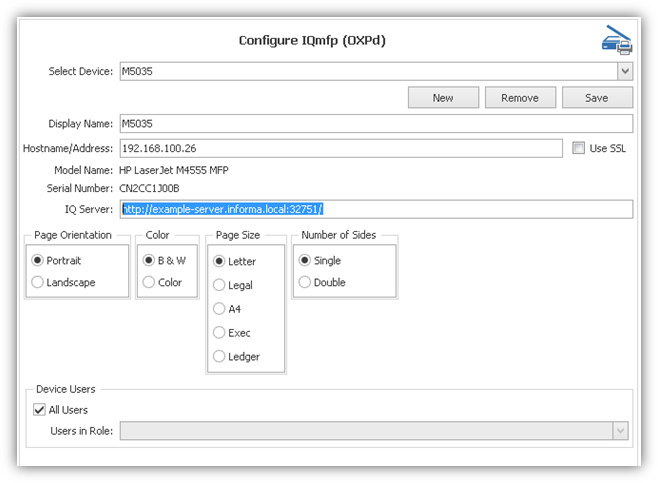
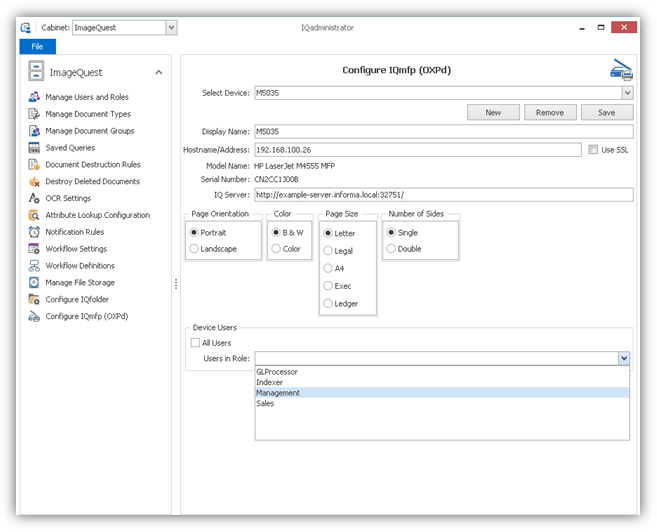
The “Device Users” section allows the administrator to determine which ImageQuest users or role users will be added to the user list on the device. Check “All Users” if all ImageQuest users should be added. Uncheck “All Users” to activate and select from the “Users in Role” drop-down.
Click “Save” to add IQmfp to the Mfp device front panel. You will be prompted to provide the device administrator credentials before the process can complete.

The following message confirms the device was added successfully.
![]()
NOTE: See the ImageQuest User’s Guide for information on using OXPd.