ImageQuest has the following feature: Destroy Deleted Documents, which allow documents and related data to be permanently “destroyed”. When document destruction is performed on a group of documents, the documents and document data are physically and permanently destroyed. Destroyed documents can longer be accessed in ImageQuest and also cannot be restored.
Destroy Deleted Documents allows the administrator to permanently destroy all or certain documents that have been flagged as “Deleted” in ImageQuest.
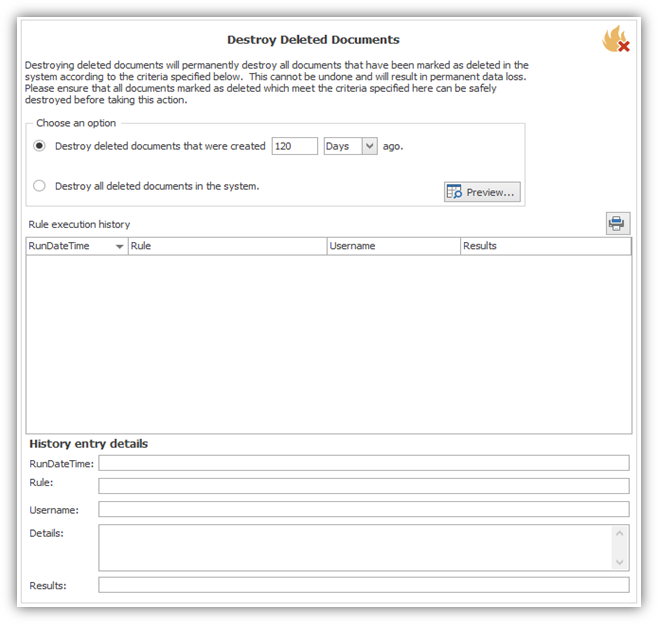
The “Choose an option” section allows the administrator to determine which deleted documents can be destroyed: documents created a certain number or Days\Years ago or all deleted documents in the ImageQuest system.
The “Destroy deleted documents that were created… ago.” option is based on the ImageQuest “CreateDateTime” system attribute assigned to a document. The administrator can change the numeric value and select “Days” or “Years” so the ImageQuest system will know how far back to search for Deleted documents.
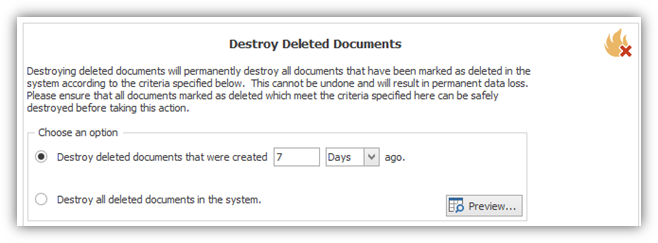
In the example below, the administrator wants to destroy all deleted documents that were created 7 days ago. The administrator selects the “Destroy deleted documents that were created… ago” option, enters “7” in the numeric field and selects “Days” from the drop-down.
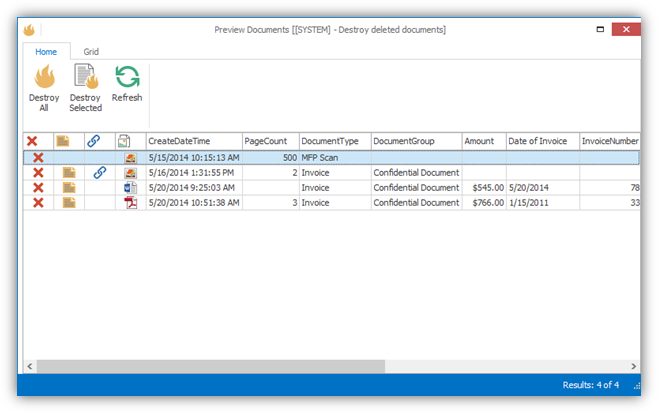
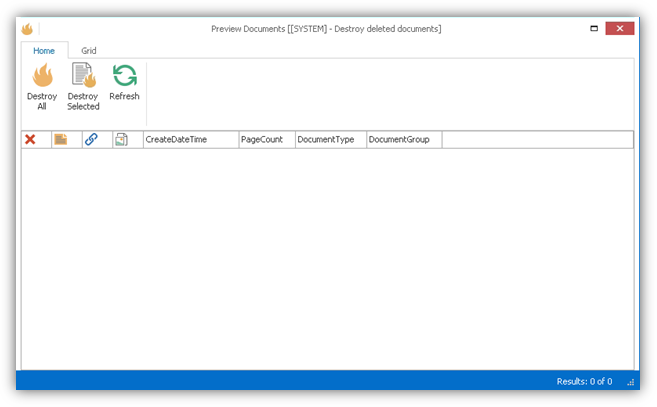
The administrator can then click “Preview” to open the “Preview Documents” window to see all the documents flagged as deleted that meet the criteria. The example below displays 4 documents. At this point, the administrator has a few different options:
“Destroy All” will permanently destroy all the documents displayed in the grid.
“Destroy Selected” will permanently destroy only the documents highlighted (selected) in the grid. The administrator can hold down the CTRL key to select multiple documents.
The “Refresh” button refreshes the current display.
The “Print” button allows the administrator to print the grid if needed.
Clicking “x” will close the Preview Documents window and will not destroy any documents.
For this example, the administrator will select “Destroy All”.
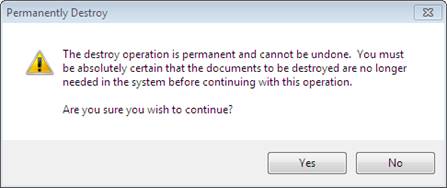
When the administrator selects “Destroy All” or “Destroy Selected”, the message below is displayed. Click “Yes” to continue and perform the operation.
Click “No” to cancel the operation and return to the Preview Documents window and none of the documents will be destroyed.
For this example, the administrator selects “Yes” to perform the document destruction.
When the operation is complete, the Preview Window will display the
results.
The “Destroy All” selection destroyed all 4 documents in the grid, so the Preview Window has 0 documents to display. If the administrator had selected 2 of the 4 documents and chose “Destroy Selected”, the Preview Window would display the remaining 2 documents once the operation was complete.
The “Rule execution history” section contains the history of each Destroy Deleted Documents operation performed and includes the RunDateTime, Rule, Username and Results columns. The IQQL query used for the operation is also displayed. The administrator can select an entry in the grid to view the details for the History entry.

If “Destroy all deleted document in the system” is selected, the Preview Documents window will display every document that is flagged as Deleted in ImageQuest. The administrator will have the same options as shown in the previous examples and the Destroy Deleted Documents operation will be logged in the history.
Note: The administrator can preview documents to be destroyed in IQadministrator from any machine, but the actual Destroy operation can only be performed from IQadministrator on the ImageQuest server.