Document Destruction Rules allow the administrator to create rules to destroy any or all ImageQuest documents, deleted or not, by Document Type, age and/or custom query. This feature can be useful for organizations that, due to document retention requirements, must destroy certain documents when the retention period has terminated. See below.
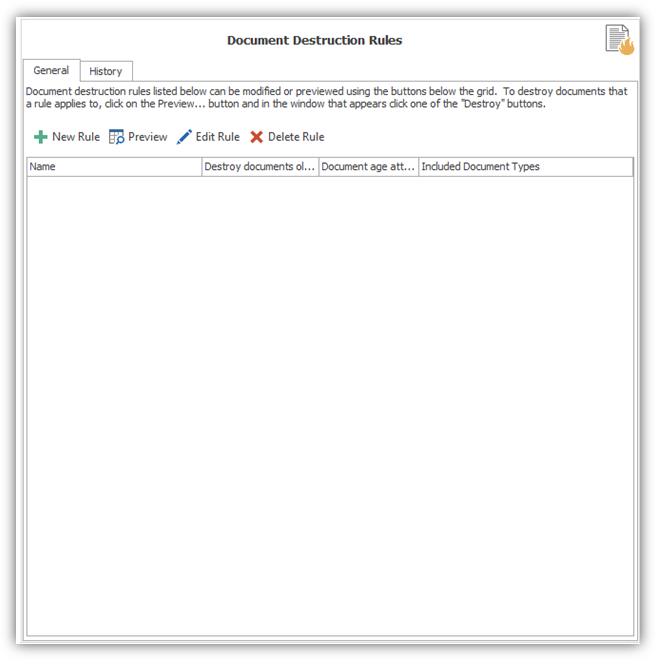
Click “New Rule” to open the Add Document Destruction Rule dialog.
Type a meaningful name in the “Name” field and select which Document Type(s) apply to the rule. In the “Destroy documents that are older than” section, change the numeric value and select “Days” or “Years” from the drop-down and then select an ImageQuest Date & Time attribute from the drop-down list in the “Determine document age using attribute” section.
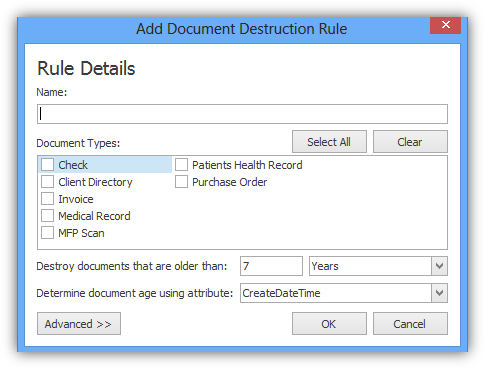
For example, the administrator wants to create a new rule to destroy all ImageQuest Employee Records where Date of Invoice is older than 7 days and Active = “False”.
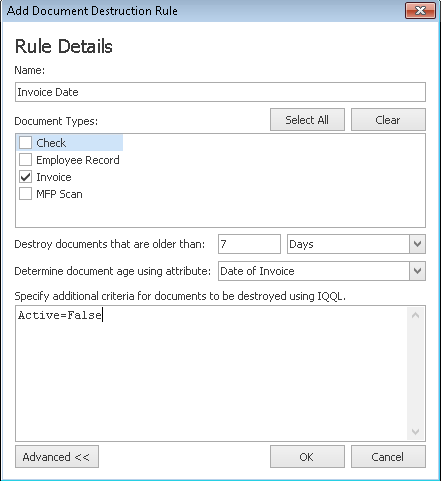
The administrator enters “Invoice Date” for the Name and selects Document Type “Invoice”. The “Destroy documents that are older than:” value is changed to “7”, “Days” is selected from the drop-down and “Date of Invoice” is selected from the “Determine document age using attribute” section.
The administrator then clicks “Advanced” to add additional criteria to the rule.
The Advanced section allows the administrator to add an IQQL (ImageQuest Query Language) query for the additional criteria.
In the example below, the administrator enters “Active=False” so the rule will only apply to Invoice Files where the value for attribute Active is False. After the configuration of the rule is complete, click “OK” to save the new rule.
The rule will be listed in the General tab and the administrator can click “Details” to view and/or modify the rule configuration, “Delete Rule” to delete the rule or “Preview” to preview and perform the actual document destruction.
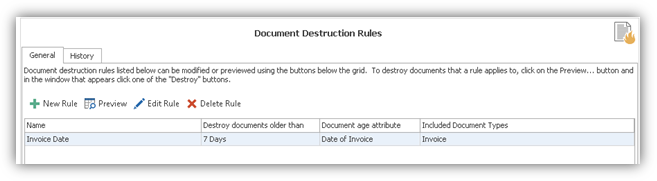
In this example, the administrator will run the “Invoice Date” rule.
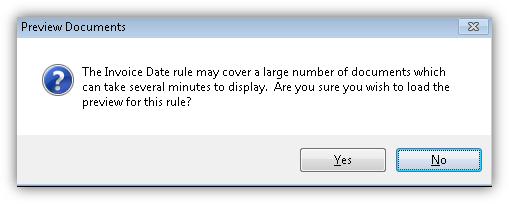
The administrator selects the rule in the list and the selects “Preview”. A message box will appear asking the administrator to confirm they wish to load the preview. Clicking “Yes” will load the Preview Window. Clicking “No” returns the administrator to the Document Destruction screen.
For this example, the administrator clicks “Yes”.
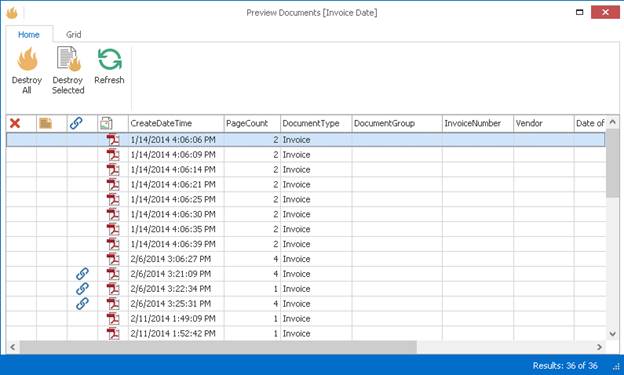
The “Preview Documents” window loads and includes the rule name in the title bar. The example below displays 36 documents. At this point, the administrator has a few different options:
“Destroy All” will permanently destroy all the documents displayed in the grid.
“Destroy Selected” will permanently destroy only the documents highlighted (selected) in the grid.
The “Refresh” button refreshes the current display. The “Print” button allows the administrator to print the grid if needed. Clicking “x” will close the Preview Documents window. None of these actions will destroy any documents.
For this example, the administrator will select “Destroy All”.
When the administrator selects “Destroy All” or “Destroy Selected”, the message below is displayed.
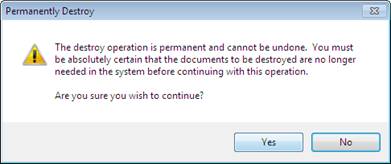
Click “Yes” to continue and perform the operation.
Click “No” to cancel the operation and return to the Preview Documents window and none of the documents will be destroyed.
For this example, the administrator selects “Yes”.
When the operation is complete, the Preview Window will display the results.
The “Destroy All” selection destroyed all 36 documents in the grid, so the Preview Window has 0 documents to display. If the administrator had selected 12 of the 36 documents and chose “Destroy Selected”, the Preview Window would display the remaining 24 documents once the operation was complete.
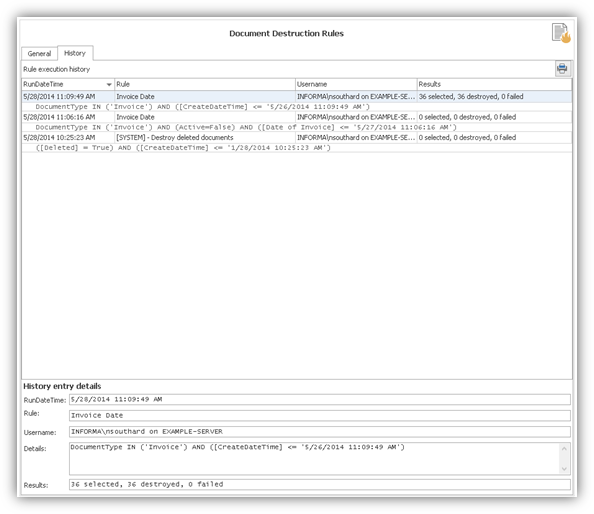
The History tab contains a history entry for each Destroy Deleted Documents operation performed and includes the RunDateTime, Rule, Username and Results columns. The IQQL query used for the operation is also displayed. The administrator can select an entry in the grid to view the details for the History entry.
Note: The administrator can preview documents to be destroyed in IQadministrator from any machine, but the actual Destroy operation can only be performed from IQadministrator on the ImageQuest server.