Input Masks
Input Masks provide restricted data input as well as formatted data output. Masks can be used to ensure that end-users enter values only in a particular format. For instance, when indexing a phone number, an end-user needs to enter only digits, while hyphens and parentheses should be automatically skipped.
Manage Document Types now includes several pre-defined attribute masks for the following ImageQuest Attribute Data Types: Text, Numeric and Date & Time.
The pre-defined input masks for Text are “US Phone Number” and “Social Security Number”.
The pre-defined input mask for Numeric is “Currency”.
The pre-defined input masks for Date & Time are “Date Only” and “Date with Time”.
In the example below, the administrator creates a new Attribute called “Phone Number”, selects “Text” for the Data Type and “US Phone Number” from the Input Mask drop-down.
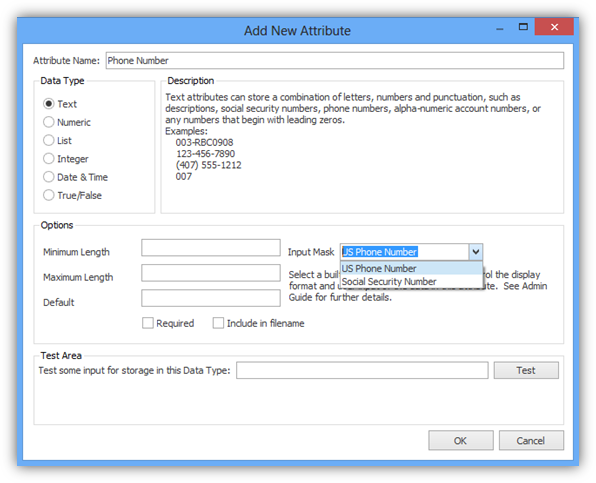
The administrator then presses the
tab key to move to “Test Area”. Note that the US Phone Number
Input Mask is applied.
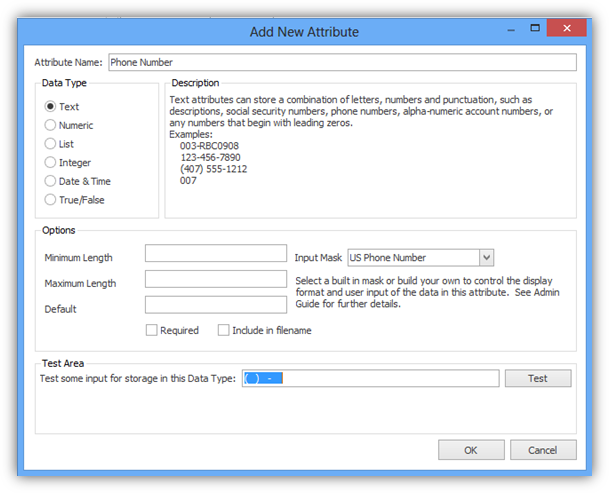
The administrator enters a test value “8774757778” and clicks “Test” to confirm the input passes validation. There is no need to enter the parentheses and hyphen characters as the mask provides them automatically. Also note that this type of mask only allows 10 numeric digits to be typed. All other keyboard characters will be ignored.
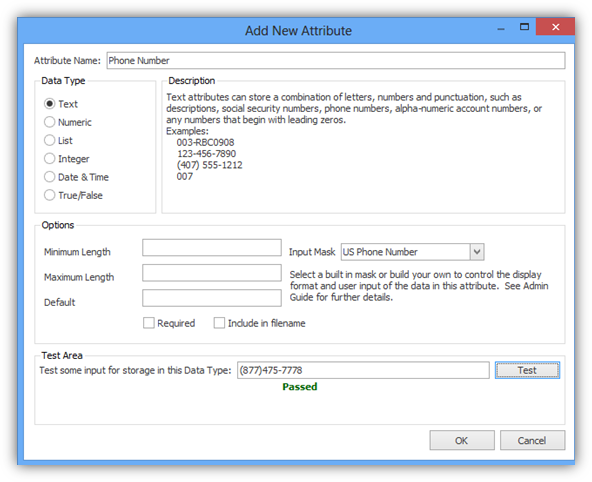
Click “OK” to save the attribute and add it to the main Attributes list.
The administrator can also create custom input masks for the Text, Integer and Numeric Data Types.
For example, perhaps an Invoice Number always begins with “INV-“ and is followed by 5 digits. The administrator wants to add an Attribute with an input mask that will automatically display the “INV-“ prefix and enforce the number of digits that can follow.
The administrator clicks “Add New Attribute”, enters “Invoice Number” for Attribute Name and selects Data Type “Text”.
For Input Mask, the administrator enters “INV-00000” and presses the Tab key. The input mask is displayed in the Test Area as “INV- “.
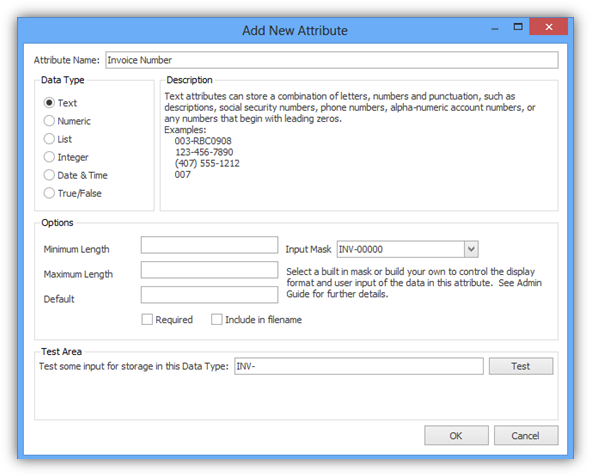
The administrator enters the value “12345” and clicks “Test” to confirm the input passes validation. Once again, the user will only need to type in the five digits as the “INV-“ will always be prefilled and cannot be deleted.
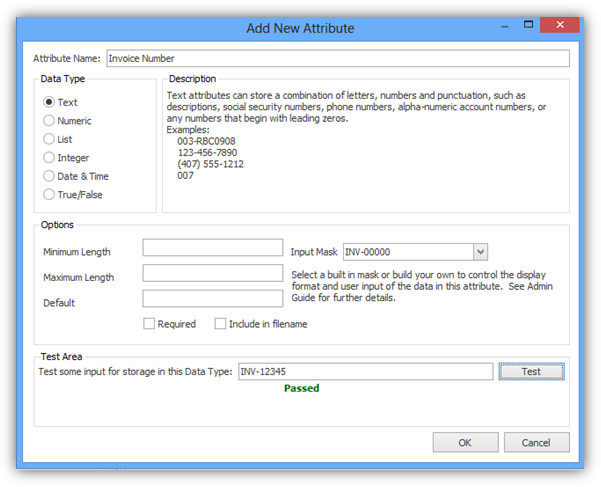
Click “OK” to save the attribute and add it to the main Attributes list and the input mask will be displayed in the Input Mask column.
In addition to the predefined input masks that are provided, the administrator has the option to create custom input masks. See the tables in the following topics for descriptions and samples on how to do this.
Note: Input Masks are not supported in WebIQ.