Creating a Logiforms Form for Integration
Note: Logiforms-specific instructions may change as the Logiforms UI and feature set evolves. If you need further assistance, please consult the Logiforms User Manual.
This section will review the requirements in Logiforms for integration with ImageQuest. In general, a form can be exported to ImageQuest if
· The form has both “Cabinet” and “DocumentType” field names that map to a Cabinet and Document Type in ImageQuest, respectively, and
· The form is configured to generate a PDF attachment, and
· The form field names map to ImageQuest attribute names.
The following instructions use a Purchase Requisition Form as an example.
Configuring Cabinet and Document Type for a Form
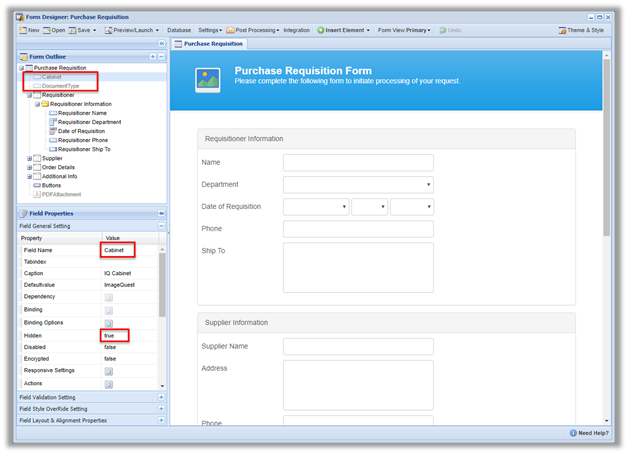
For a form to export to ImageQuest, it must have “Cabinet” and “DocumentType” fields. In the example below, the form has a hidden text field with a Field Name of “Cabinet” and a default value of “ImageQuest.” This allows the form to map to an ImageQuest document type in the “ImageQuest” cabinet. Similarly, the form has a hidden text field with a Field Name of “DocumentType” and a default value of “Purchase Requisition.” Therefore, retrieved form submissions will map to a “Purchase Requisition” document type in the “ImageQuest” cabinet.
Note: It is recommended that “Cabinet” and “DocumentType” fields be hidden for most use cases, as form submitters should not often have to provide information about how the form maps to ImageQuest.
Configuring Form Fields to Map to ImageQuest Attributes
Individual fields on a form are mapped to ImageQuest attributes by convention: the field name must match the ImageQuest attribute name. If a field name does not map to an ImageQuest attribute, it will be ignored by ImageQuest. This section will review some basic mappings.
Text Field Mapping to a Text
Attribute
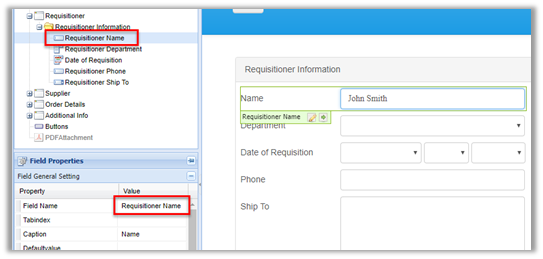
In the example below, a text field is mapped to
the “Requisitioner Name” text attribute on the Purchase Requisition
document type in ImageQuest. This is done by setting the Field
Name. Note that the Caption is for display purposes only
and is not used in mapping.
Dropdown Mapping to a List
Attribute
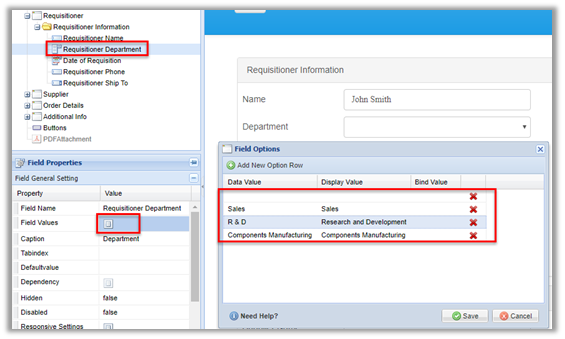
In the example below, a dropdown field is mapped
to the “Requisitioner Department” list attribute on the Purchase
Requisition document type in ImageQuest. The options in the
dropdown are set using the Field Values feature, where each
Field Value is given a Data Value that maps to an
item in the ImageQuest list attribute.
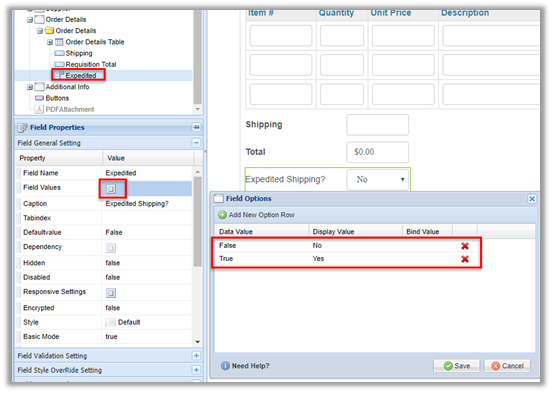
Mapping to True/False Attributes in
ImageQuest
For technical reasons, checkboxes in Logiforms currently cannot map
to True/False attributes in ImageQuest. Therefore, we recommend
using dropdowns to collect True/False data by supplying a dropdown
that has Data Value options of “True”, “False”, or [blank].
In the example below, the dropdown is mapped to the “Expedited”
True/False attribute on the Purchase Requisition document type in
ImageQuest. The Data Value options are “True” and “False”
with display values of “Yes” and “No”, respectively. The same
procedure can be followed to configure mapping to True/False
attributes for a Radio Button Group on a form.
Other Mapping Notes
While not covered here in detail, integration supports mapping of
all ImageQuset attribute types, such as Integer, Number, and Date
& Time.
Configuring PDF Generation
ImageQuest requires that an underlying PDF document be collected along with any fields mapped to ImageQuest attributes. This can be advantageous in that there may be form data that is shown on the PDF but not collected in attributes, or vice versa.
The example below walks through configuring a simple PDF generation template that puts all form fields and values on a PDF. Logiforms offers many options for formatting and customizing PDFs beyond this simple approach.
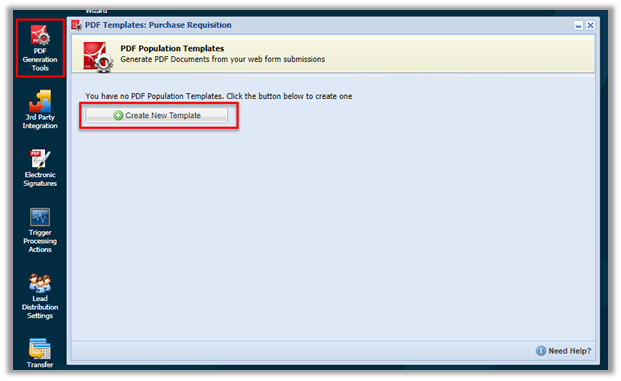
First, open “PDF Generation Tools,” select the desired form, and click “Create New Template.”
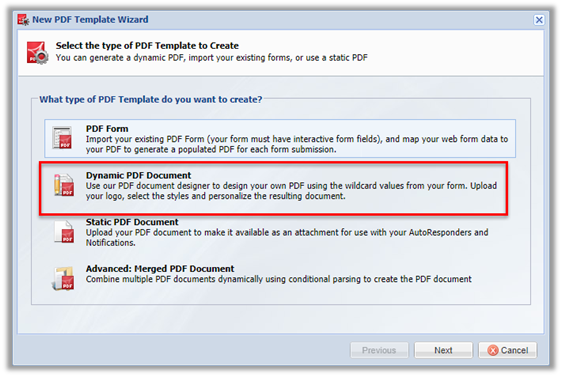
Click “Next” on the first screen of the “New
PDF Template Wizard” and then select “Dynamic PDF Template.”
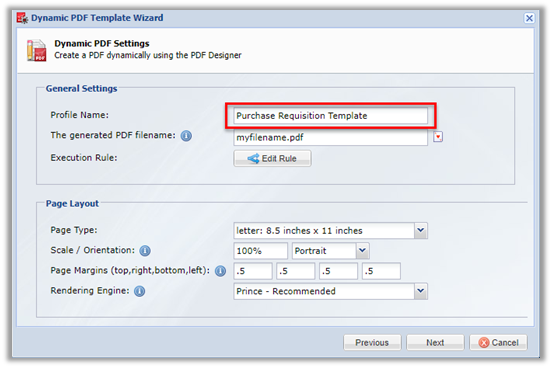
In this example, we set the “Profile Name” of
the template to a user-friendly name and leave other options with
their default values. The “Profile Name” does not appear in
ImageQuest.
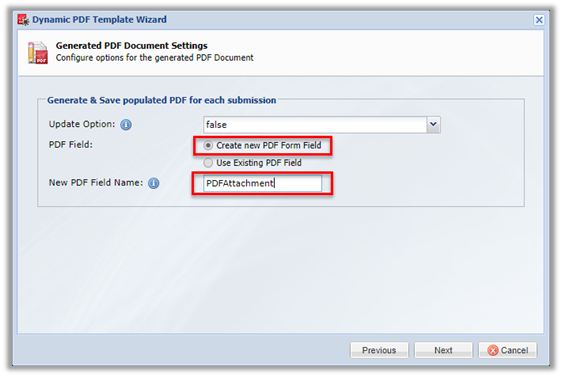
On the next screen, a new PDF Form Field is
created. This invisible field exists on the form and holds the
generated PDF attachment. There are no requirements regarding what
the field name must be.
Skip the screen for PDF encryption (ImageQuest
cannot import password-protected PDFs). On the final screen, click
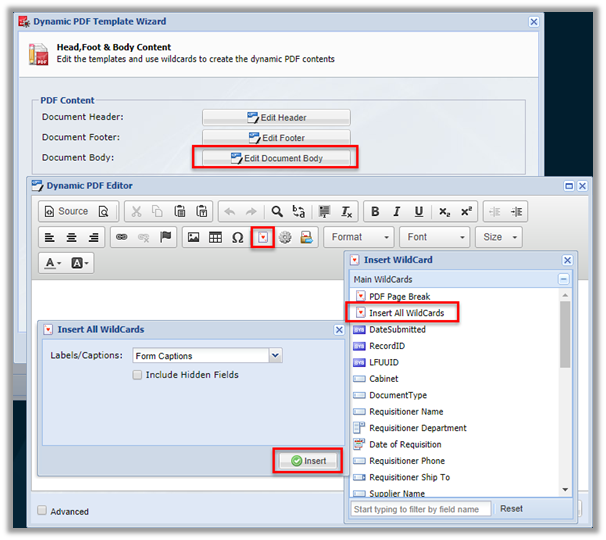
the “Edit Document Body” button, which brings up the PDF Editor.
For this example, click the Wildcards option on the toolbar,
select “Insert All WildCards,” and click Insert. This
inserts a table of form field values into the editor. Click
Save in the editor and then Finish in the main
wizard. Completed forms should now generate PDFs that can be
exported to ImageQuest.