Updating Documents
After documents have been indexed, users may update or edit attribute data as well as revise individual documents. As these changes are made, they are recorded in Document History which serves as an audit trail for administrative review. Reasons for these changes to individual records may be noted in the Notes panel for future reference.
Notes
The Notes panel is
beneficial to users because it allows for adding comments to a
document as illustrated below. For example, the outlined
document in this figure has a note. When a note is entered
for a specific document, the ![]() icon appears in the Note column next
to that document. The Notes and History tabs
are located at the bottom of the screen; click the Notes tab
to view the notes for the highlighted document. This note,
‘Additional services rendered’ has been entered on 5/16/2014 at
9:35:14 AM by the User “demo”. The Notes panel will
update automatically as other documents are selected. If the
Notes panel has been removed from the view, it may be
returned by clicking the Notes button
icon appears in the Note column next
to that document. The Notes and History tabs
are located at the bottom of the screen; click the Notes tab
to view the notes for the highlighted document. This note,
‘Additional services rendered’ has been entered on 5/16/2014 at
9:35:14 AM by the User “demo”. The Notes panel will
update automatically as other documents are selected. If the
Notes panel has been removed from the view, it may be
returned by clicking the Notes button ![]() from theDocument ribbon
tab.
from theDocument ribbon
tab.

Note: Once a note is entered, it cannot be updated or changed. Notes cannot be searched. The “Update Document” permission is required for individual users to add notes.
Edit a Document
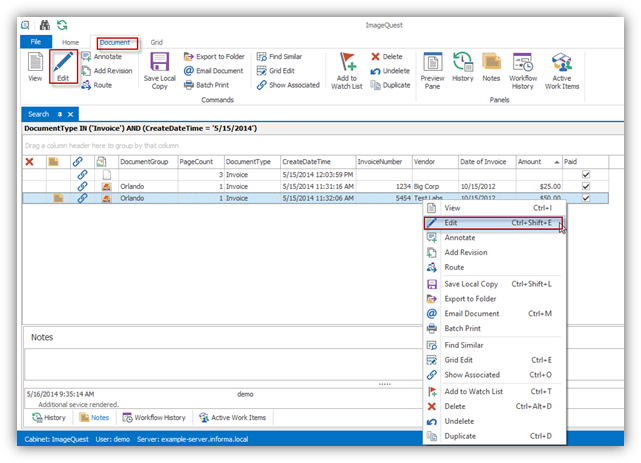
To edit a document, right-click on the
highlighted document and select Edit from the drop-down menu
as demonstrated below. You may also click on the Edit button
![]() from the Document ribbon
tab.
from the Document ribbon
tab.
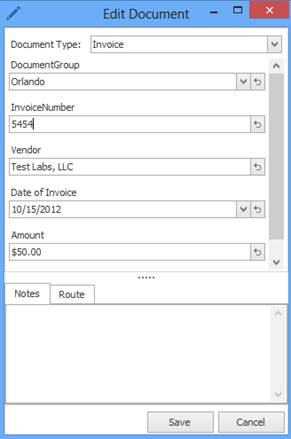
The “Edit Document” window appears so that changes may be made to the document as illustrated on the next page. The Document Type for editing in this sample is “Invoice”. Once the document is updated, click “Save” to save the changes; if the user decides that no changes are necessary, click “Cancel”.
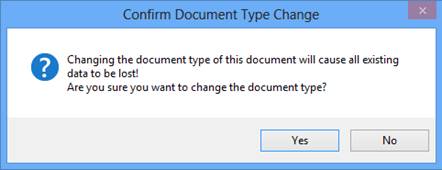
Selecting a new Document Type in the drop-down menu will refresh the screen to display the attributes applicable to the selected Document Type. When the user clicks “Save,” the window below appears to confirm the Document Type change. Click “Yes” to proceed.
If the new Document Type has attributes that match the original Document Type, the initial data will be retained. Any attributes of the new Document Type that do not match the original Document Type will be empty, and the new information can be entered.
To edit multiple documents, right-click on the highlighted documents and select Edit from the drop-down. You may also use the Edit button on the ribbon.
When more than one document is selected for editing, only the attributes that are applicable to both documents will appear. Check the box next to the attribute you wish to edit, update the index information and then click “Update” when finished. This will update all the records with the new information. See the sample below.
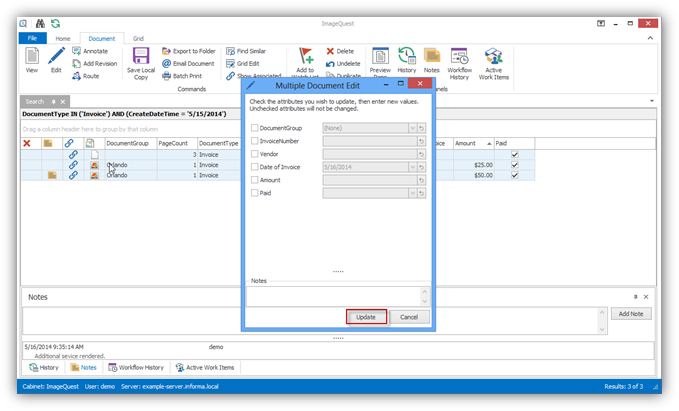
Note: The Document Type field cannot be changed when using “Multiple Document Edit”. This can only be changed for one document at a time.
DocuSign Connector
The DocuSign connector allows documents to be sent for digital signature and then automatically saved back to IQ as revisions once they have been signed. Just select the document that needs to be signed and click the DocuSign button in the ribbon.
For information about how DocuSign-originated documents can be saved automatically to IQ as new documents, please contact your administrator.
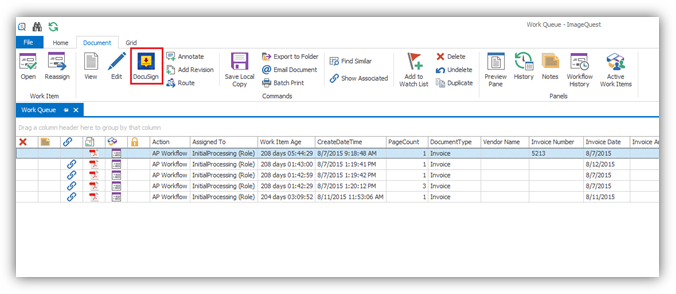
After the DocuSign button is clicked, it will open a web browser that opens to DocuSign page with the document already uploaded. Recipients can be added via the Add Recipients button on the left.
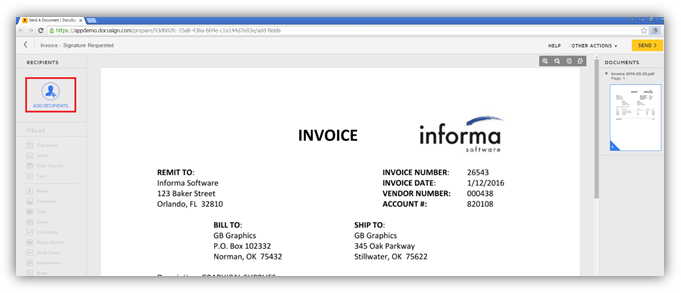
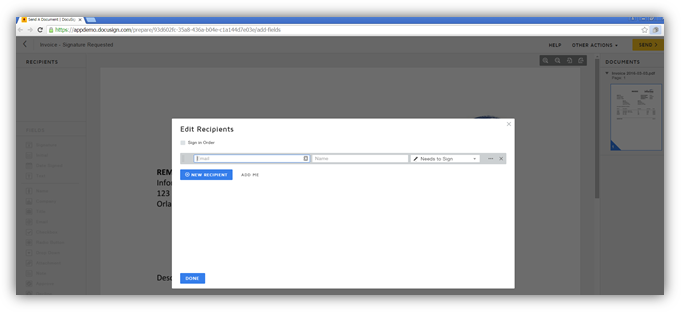
On the Add Recipient screen, a new recipient can be added by inputting an email address and name. Multiple recipients can be added by clicking on “New Recipient” multiple times. If “Sign in Order” is checked, the document must be signed in order defined for the recipients. Click “DONE” once all recipients have been added.
After recipients are added, click on each
recipient and add fields for that recipient, respectively. To add a
signature, click on Signature and place the mouse over the area
that needs to be signed. Click on the document to place the
signature location. Once all fields are complete for all
recipients, click “Send” in the top right corner. 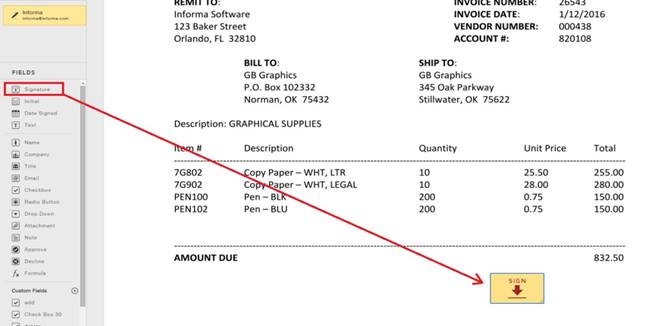
Once the document is sent, the recipient will
receive an email notification that states a document needs to be
signed with a link to the document. After the recipient
signs, an email with the signed document is sent to the
recipient. If the sender has email notification set up for
ImageQuest, the sender of the document will also receive an email
notifying the sender that the document has been signed. The
sender will be sent a link in the email to view the signed
document, which is also saved as a revision in ImageQuest.
The history details will also show details on current state of the
document and signing activity. If a recipient declines to sign a
document, this will also be reflected in the document history and
the ImageQuest user will receive an email notification.
Note: The DocuSign Connector requires
configuration by an administrator.
Note: DocuSign documents can also be originated at DocuSign and imported into IQ as new documents. Contact your administrator for more information.
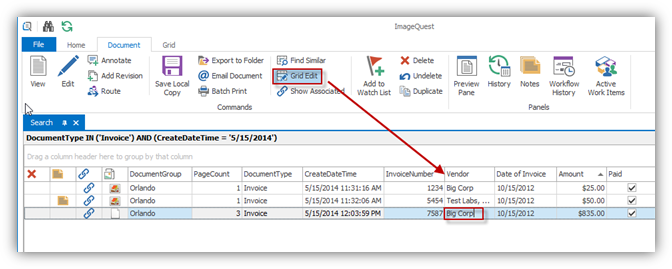
Grid Edit
The grid displaying the indexed documents may
also be edited directly using ![]() (Ctrl+E) as illustrated
below. Toggling the Grid Edit button makes the search grid
act much like a spreadsheet program such as Microsoft Excel in that
you can type directly into the fields. Use caution while
Grid Edit is enabled as changes are saved automatically once you
click off of the document row. Fields highlighted in gray
are either system fields or attributes that are not associated with
the document type; these fields cannot be edited.
(Ctrl+E) as illustrated
below. Toggling the Grid Edit button makes the search grid
act much like a spreadsheet program such as Microsoft Excel in that
you can type directly into the fields. Use caution while
Grid Edit is enabled as changes are saved automatically once you
click off of the document row. Fields highlighted in gray
are either system fields or attributes that are not associated with
the document type; these fields cannot be edited.
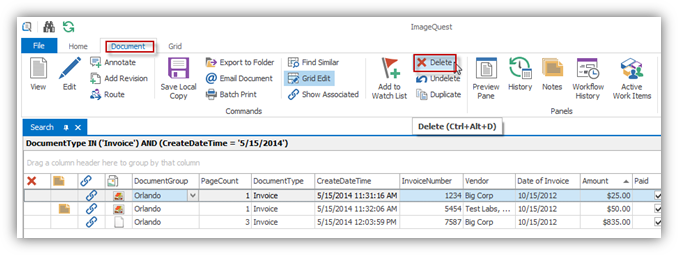
Delete or Undelete Documents
To delete a document, right-click on a record
and select Delete, or highlight one or more records and
click the Delete button ![]() from the “Document” ribbon
group as illustrated below.
from the “Document” ribbon
group as illustrated below.
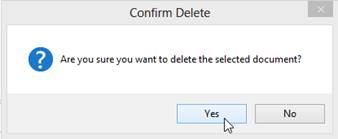
The “Confirm Delete” window appears to ensure that the user desires to delete the selected document; click “Yes” to proceed.
The user will then be prompted to enter a note explaining why the document was deleted as shown below. For example, this document was deleted because it was a duplicate document in the grid. Click “OK” to complete the delete process.

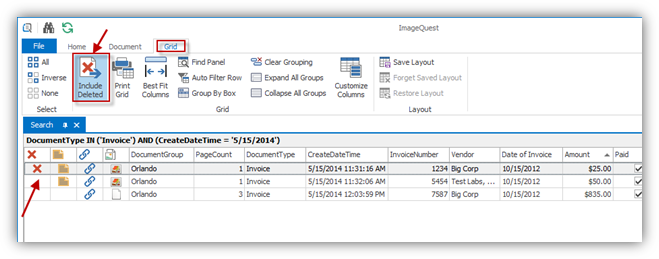
Records deleted from IQdesktop are never
actually deleted but are flagged as such, much like the Windows
recycling bin. Selecting “Include Deleted” button from the
Grid ribbon group allows a user to show or hide the deleted
documents if he or she has permissions to do so. Deleted
records have a red ![]() at the beginning of the record
as shown below.
at the beginning of the record
as shown below.
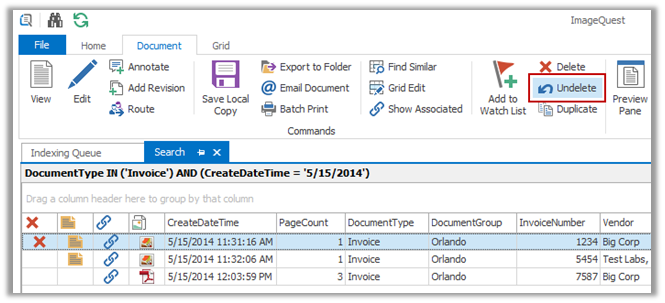
Selecting “Undelete” from the Document ribbon
(or from the document’s right-click menu) as shown on the next page
removes the red ![]() from the record and returns
the document to its previous, searchable state.
from the record and returns
the document to its previous, searchable state.
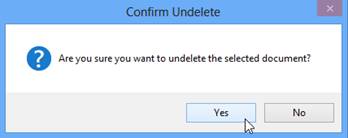
The “Confirm Undelete” window appears to ensure that the user desires to undelete the selected document as shown here; click “Yes” to proceed.
The user will then be prompted to enter a note explaining why the document was undeleted as noted below.
Note: Users must have the “Delete Documents” permission to delete documents and the “View Deleted Documents” permission to search for and display documents with a “Deleted” status. To undelete a record, users must have both of the permissions listed above. See the ImageQuest Administrator’s Guide for more information.
Revising Documents
IQdesktop supports the revision of documents so that original files can be replaced with more current files. Original files may still be accessed via the History panel (see the following page).
In a “Search” tab, right-click on the highlighted document and select Add Revision, or select it from the “Document” ribbon tab and click the “Add Revision” button as illustrated below.
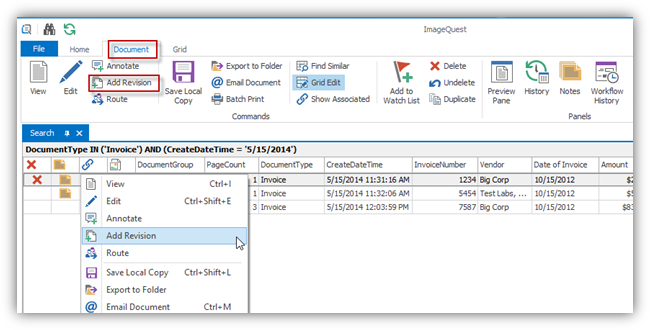
After clicking Add Revision, the user will be prompted to locate a file to update the current record. The new file will replace the existing file. There is no limit on how many revisions are permitted to a document.
To view previous document revisions, right-click on any of the “Revision” actions in the History panel and click View Revision as shown below. To see the revision numbers, click the “Show Details” button.

Note: The file type being revised must be the same as the file type intended to be added, except in the case of .pdf files which may be .pdf or .tif.
Note: Documents that are revised will be re-queued for IQocr. Only the most recent revision will be full-text searchable.
Note: The “Update Document” permission is required for revising documents.
Document History
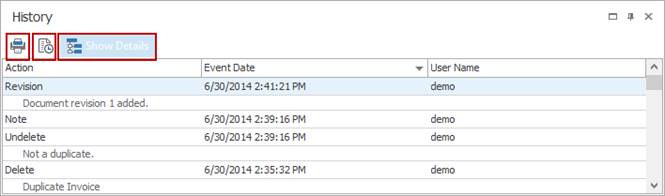
Anything that happens to a document, be it user related or system related, gets recorded into the History panel making it easy for someone to see exactly who did what and when. By default, the History panel is located at the bottom of the screen underneath the grid. Highlight a document and click on the History button at the screen in the “Document” ribbon group to see the History panel.
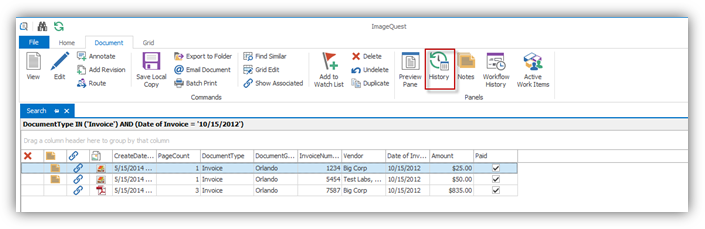
The History panel shows three columns, “Action”, “Event Date” and “User Name” as seen in the screenshot below. These columns can be sorted just like the main search grid columns.
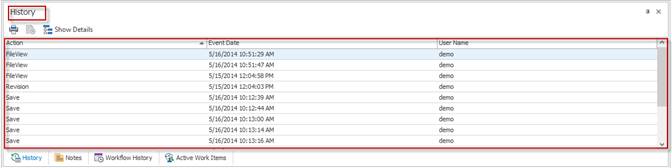
See the screenshot below, which highlights the History Toolbar features—“Print”, “View Revision” and “Show Details”. The user may print the history of any document, view its revision (if any) or expand the action details to see more information.